

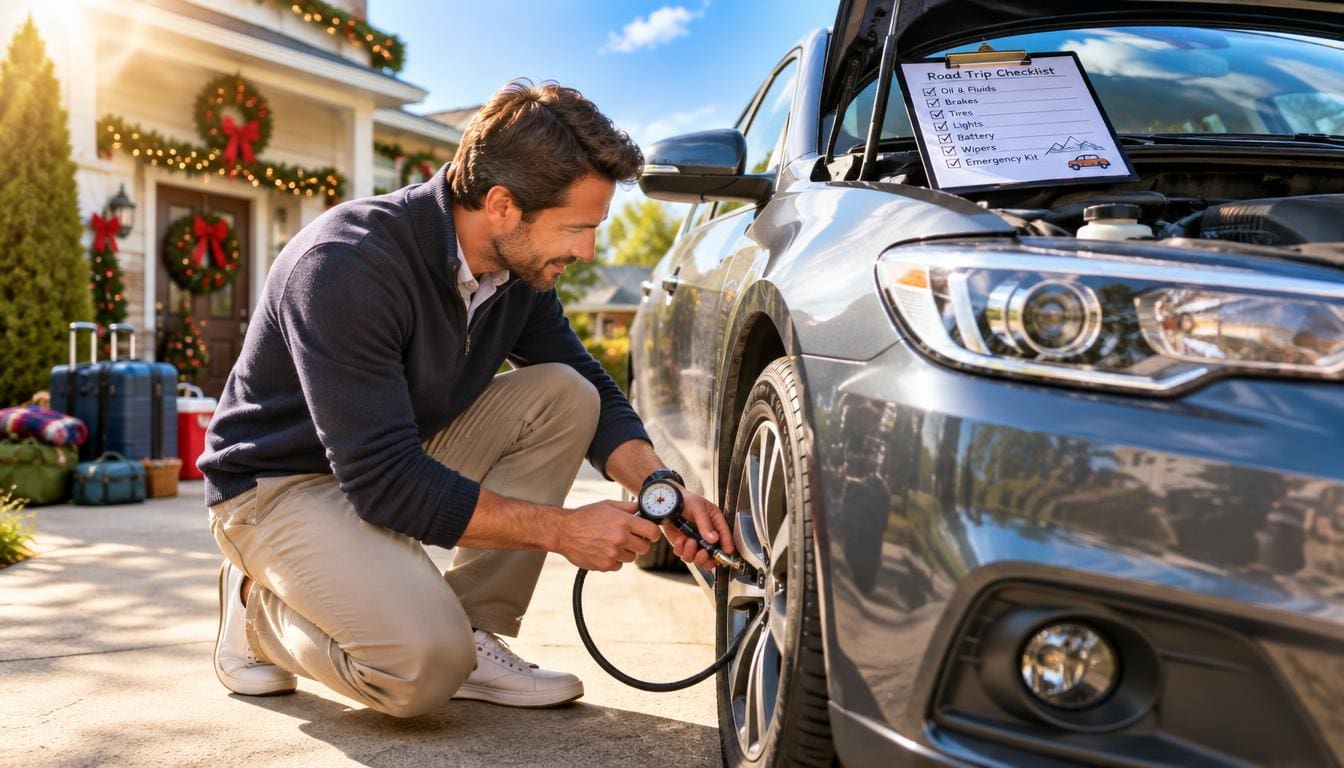
A few checks before a holiday drive can help you catch problems while there is still time to address them. A focused inspection helps whether you are driving across town or taking a long highway trip. Set aside time before departure, rather than discovering an issue on the road. Your car’s condition, the weather, and the route can all shape what needs attention. This road trip car inspection checklist gives you a clear way to look for concerns and decide when to get help. It cannot promise that every breakdown will be avoided. Treat any safety concern as a reason to pause and get qualified help before setting out.
Key Takeaways
- Do a walk-around the day before you leave.
- Check tires, brakes, lights, battery, fluids, belts, and hoses.
- Use your owner’s manual for pressure and service needs.
- Pack useful roadside emergency supplies for your route and weather.
- Ask a mechanic about warning signs you cannot resolve.
How to Use a Road Trip Car Inspection Checklist
A simple pass-or-needs-attention record makes a pre-trip check easier to finish and act on. A free road trip car inspection checklist can help you screen your own vehicle, but it cannot replace a mechanic’s assessment when you find a problem. Mark each item as you go, then keep a short repair list beside the checklist.
Set aside about 15 minutes for a walk-around of tires, lights, wipers, brakes, and backup gear. The goal is to spot changes or visible concerns, not to diagnose every part yourself. A clear note such as “left rear light out” gives you a useful task to handle.
Run a 15-minute walk-around
Start at a spot where you can move safely around the parked car. Choose a steady route around it, and keep your checklist or phone handy. Give each item one of two marks: checked or needs attention.
- Choose a well-lit, level place to park.
- Walk around the vehicle in one direction.
- Record each concern in plain words.
- Make a short repair list and leave time to address it.
This order keeps you from skipping a corner or forgetting a concern after you move inside. If another person helps, ask them to confirm each item as you record it. Add a note when an item needs a closer look from a repair shop.
Do the check the day before
Complete the check the day before departure, not while loading bags. That timing leaves room to add air, replace wipers, buy washer fluid, change a bulb, or contact a mechanic. Some parts or appointments may take longer to arrange than expected.
Leave a buffer between finding a problem and your planned departure. A repair list also helps you decide which items need prompt service and which need more information. Do the walk-around the day before departure, not in the minutes before you leave.
Are Your Tires Safe for Highway Travel?
A tire can look inflated and still need attention because pressure, tread, and sidewall condition are separate checks. Tread depth means the amount of usable rubber between the tire’s tread surface and its wear indicators. Check your tires before highway travel, since a problem can affect handling and tire life.
Use vehicle-manufacturer tire pressure as your target, not the maximum printed on the tire sidewall. Check pressure with a gauge when tires are cold, then compare it with the driver-side door-jamb sticker or owner’s manual. Check the spare as well.
Pressure, spare, and tools
Cold tires have not been driven recently, so their pressure reading is more useful for comparison. Do not use the sidewall’s maximum pressure as the recommended tire inflation level. Confirm that your spare tire is inflated and that the jack and lug wrench work.
A gauge and working tools matter if you need to check a tire far from home. If the vehicle has a compact spare, review its limits in the owner’s manual before travel. A spare does not help if you cannot safely raise the car or loosen its lug nuts.
Tread and visible damage
Use coin tests as quick screens, not as universal legal cutoffs. In the quarter test, place Washington’s head downward in a tread groove. If his head is covered, that spot has at least 4/32 inch of tread; if the top shows, start shopping for tires.
For the penny test, place Lincoln’s head downward. If the top of his head is visible, replace the tire. Check several grooves because wear may hide along an inner or outer edge. Compare both sides of each tire when you can see them safely.
| Check type | How to check | Finding | Response |
|---|---|---|---|
| Quarter test | Place Washington head-down in grooves | Head covered: at least 4/32 inch | Visible head: shop for tires |
| Penny test | Place Lincoln head-down in a groove | Top of head visible | Replace the tire |
| Visual inspection | Check grooves, tread edges, and sidewalls | Cracks, bulges, cords, nails, cuts, or gouges | Ask a tire professional to inspect |
Cracks, bulges, or visible cord call for a tire-professional inspection. Visible nails, cuts, and gouges also need attention. Some tire makers advise replacement after 6 to 10 years, even when tread remains; the last four DOT code digits show the week and year made.
If a tire will not hold its specified pressure, have the cause checked before relying on it for a long drive.
Do the Brakes Feel and Sound Normal?
A change in how the brake pedal feels or how the car stops is a reason to take the concern seriously before a long drive. Brakes should respond in a way that feels familiar during normal, safe driving. Arrange a pre-trip check for a spongy or pulsing pedal, pulling, or longer stops.
Pay attention to the car’s direction and feel while driving in a safe place. A pull to one side, a vibration, or a longer stopping distance can signal a brake problem. Do not try to test the brakes with a risky stop or sudden maneuver.
Pedal feel and stopping behavior
A spongy pedal may feel softer or travel farther than usual. Pulsing through the pedal or steering wheel is another change to report. Tell a mechanic when you first noticed the change and whether it happens during each stop.
Brake professionals may inspect pads, rotors, shoes, and drums. Those parts work together to slow the vehicle, and a professional can check their condition. Describe the sound or feel clearly instead of guessing which part has failed.
Grinding means stop driving
Grinding brakes are different from a concern that can wait for a pre-trip appointment. Do not conduct a highway test if you hear grinding. That sound calls for stopping the drive and arranging service, not seeing whether it gets worse at speed.
If grinding begins while you are already driving, pull over somewhere safe and leave the car parked. A noisy brake system may need prompt attention, even if the car still seems to stop. If you are unsure whether a sound is grinding, ask a repair professional before continuing a long trip.
If the brakes grind, leave the car parked and arrange service.
Will the Battery and Lights Hold Up?
A slow crank or a recent jump-start can be an early sign that your battery needs attention. A battery test can help you learn whether it is ready for a trip. Arrange a test if the battery is at least 3 years old, cranks slowly, shows terminal corrosion, or recently needed a jump.
Check for white or blue-gray buildup around the terminals, and make sure the cable connections look tight. Battery acid can be hazardous, so ask a professional to handle terminal work if you are unfamiliar with safe procedures. A test is a better way to assess battery condition than age alone.
Battery age and condition
A battery problem can leave you unable to start the vehicle after a stop. Note any recent starting trouble when you call for a test. A mechanic can also check the charging system if the test points to a concern beyond the battery.
Do not touch damaged cables or attempt work that makes you unsure about safety. Keep metal tools away from battery terminals unless you know the correct procedure. Tell the repair shop about a recent jump-start, even if the car now starts normally.
Test every exterior light
Test each exterior light while the car is parked. Ask another person to help confirm the brake lights from behind the vehicle. Check the following lights one by one:
- Headlights, including high and low beams.
- Hazard lights.
- Turn signals, front and rear.
- Brake lights, with a helper watching from behind.
Check the lights in daylight or a well-lit area, then look again when they are easier to see. Make sure each signal turns off when it should, too. A failed bulb can make it harder for another driver to see your actions.
Replace a failed bulb before departure rather than relying on another driver to spot the problem.
Can You See Clearly Through the Windshield?
A wiper that skips or smears can quickly make a dirty windshield harder to see through. Test the blades and washer spray together before travel. Replace blades that streak, skip, chatter, or leave a smear in your line of sight.
Use the windshield washer to spray the glass, then run the wipers. Check that the nozzles send fluid onto the windshield and that each blade clears it evenly. Top off windshield washer fluid before leaving.
Wiper blades and washer spray
Look for streaks, skipped areas, chatter, or a smear where you need a clear view. These signs can make rain, road grime, or insect debris harder to clear. A blade may look intact but still fail to wipe smoothly.
Check that the washer nozzles spray adequately across the glass. If fluid does not reach the windshield, the nozzles may need attention. Keep washer fluid for your vehicle and expected weather, rather than relying on water alone.
Glass and line-of-sight visibility
Look over the windshield for cracks that affect visibility. A crack in the driver’s line of sight can distract you or block part of the road view. Ask a glass professional about damage that may worsen or interfere with safe driving.
Visibility can change quickly when weather or road spray hits the windshield. Check the glass from the driver’s seat as well as from outside. Replace any blade that leaves a smear across the driver’s view before relying on it in rain.
Are the Engine Oil and Other Fluids at the Right Levels?
Check fluid levels only under the conditions and by the method specified for your vehicle. Use the owner’s manual for details, since some vehicles have different checks or no dipstick. Keep coolant and brake fluid within their marked ranges, and check both with the car level and engine cool.
Pooling liquid beneath the vehicle or repeatedly low levels can point to a leak. Dirty coolant or coolant with particles may need professional assessment, not repeated topping off. Note the fluid’s location and appearance before asking for service.
Engine oil and coolant
Check engine oil with the dipstick. Pull it out, wipe it clean, put it back fully, then remove it again to read the level. Check the oil’s color and follow the service interval in your owner’s manual.
Check the coolant reservoir only when the engine is cool and the car is on level ground. Keep the level within its marked range, and top off as needed with the correct coolant. Never open a hot cooling system.
Some vehicles use other fluids that you can inspect, while others do not. A newer car may have a sealed transmission without a dipstick. Electric power steering has no steering fluid to check.
Brake and other service fluids
Check brake fluid on level ground with the engine cool, and compare it with the marked range. Low brake fluid can point to worn brake parts or a leak. Find the cause rather than treating it as a simple top-off.
Use the manual for the right way to check transmission fluid, power-steering fluid, and other service fluids. Some systems require a specific temperature or service procedure. Do not guess at a level when the vehicle’s instructions are unclear.
- Engine oil.
- Coolant.
- Brake fluid.
- Transmission fluid.
- Power-steering fluid.
- Windshield washer fluid.
Windshield washer fluid is easy to overlook when you check under the hood. Check which fluid containers your car uses, since some systems are sealed or electric. Treat low brake fluid as a reason to find out why it is low, not as an automatic top-off task.
Are Belts and Hoses Ready for a Long Drive?
A cracked belt or a soft, swollen hose is easier to address before it fails on the road. Check visible belts and hoses with the engine off and cool. Have an obvious defect reviewed before departure.
Belts help run engine accessories, while hoses carry coolant through the cooling system. A damaged part can affect how the vehicle runs or stays cool. Do not touch hot or moving engine components during an inspection.
Drive belts under the hood
Look at the serpentine belt for cracks, fraying, or other clear damage. Check the visible surface without pulling or twisting the belt. If you cannot see it safely, let a mechanic inspect it.
A belt’s appearance alone cannot show exactly how long it will last. A visible crack or frayed edge is still a reason to ask for service before a long drive. Tell the mechanic which part of the belt looked damaged.
Hoses, leaks, and soft spots
Look for coolant hoses that appear swollen, brittle, or soft. Check around clamps, the radiator, and the water pump for signs of leaks. A wet area or dried residue can help point to a connection that needs attention.
Do not squeeze a hot hose or reach near a fan that may start. A damaged connection can worsen under heat and pressure. Ask a mechanic to assess a damaged belt or hose rather than trying to judge its remaining life by appearance alone.
Does the Climate Control Work in Every Setting?
Test the climate controls before departure so a problem is not discovered after hours on the road. Try the A/C at its settings and check both airflow and cooling. Weak airflow, reduced cooling, or a musty smell may call for diagnosis.
A clogged cabin air filter can reduce airflow through the vents. Check the filter and replace it as needed, using the vehicle manual for its location. A filter may not explain every drop in cooling power.
A/C performance
Run the A/C at different settings and note how much air reaches the cabin. Check whether the air cools as expected. A clear change from normal can point to a system issue that needs a closer look.
A musty odor can also be a reason to ask for an inspection. Tell the repair shop when the smell appears and whether airflow has changed. Those details can help narrow down the concern.
Heat, filters, and airflow
Test the heater as well as the A/C, especially when the expected weather calls for heat. Try different fan speeds and vent settings. Check that the controls respond and that air reaches the selected vents.
Cabin airflow can affect comfort during a long trip, but it can also affect how well you manage changing conditions. If cooling or airflow has noticeably declined, arrange an inspection instead of assuming a filter is the only cause.
How Do 30-, 60-, and 90-thousand-mile Service Intervals Work?
The 30-60-90 rule is a shorthand for checking scheduled maintenance at mileage milestones, not a substitute for your owner’s manual. Your manual sets the actual service schedule for your vehicle. These mile markers can help you see when broader service may be due.
Service needs vary by model, engine, and driving conditions. Use the manual’s schedule and any service monitor in your vehicle. Tire rotation is a separate routine task, not something to save for a 30,000-mile visit.
What 30,000- and 60,000-mile service may cover
A 30,000-mile visit may cover oil and oil filter, tires, fluids, filters, battery, belts, hoses, wipers, suspension, and steering. The owner’s manual sets the exact recommendations. Rotate tires every 5,000 to 7,500 miles, rather than waiting for the 30,000-mile milestone.
At 60,000 miles, service may add belt inspection, transmission-fluid service, brake-system maintenance, and ignition and fuel-system components. The exact work still depends on the vehicle. Check records to see which items were already completed.
| Mileage milestone | Typical service focus | Examples of checks or work | Vehicle-specific caveat |
|---|---|---|---|
| 30,000 miles | Broad routine review | Oil, filters, fluids, tires, belts, hoses | Manual sets the service list |
| 60,000 miles | Added system maintenance | Transmission fluid, brakes, ignition, fuel | Intervals differ by model |
| 90,000 miles | Major part replacement review | Timing belt, and often water pump | Check earlier replacement records |
Timing belts near 90,000 miles
A timing belt may need replacement at 90,000 miles if it was not replaced at 60,000 miles. The water pump is often changed at the same time. Check the manual and service records, since the right interval depends on the vehicle.
Some cars use a timing chain instead of a timing belt, so do not assume your car has the same part or schedule. Keep receipts or service notes with the vehicle records. A repair shop can help identify work that is due based on the manual.
For a road trip car maintenance checklist, compare scheduled oil, tire, filter, belt, fluid, and inspection items with your manual. Add only the work that applies to your model and mileage. Check your manual’s schedule before deciding that a milestone service is due or overdue.
What Belongs in a Roadside Emergency Kit?
A useful emergency kit covers visibility, communication, first aid, and basic roadside needs. Pack supplies that help you stay visible, get help, and manage simple needs while you wait. Choose items that fit your route, weather, passengers, and vehicle.
Keep the kit together in a spot you can reach. Check any medication before departure, and replace items you have used. A portable power supply may also offer jump-starting capability or a built-in light.
Roadside basics
Group your supplies by purpose so you can find them without emptying the car. A five-part list gives you a quick packing check:
- Visibility: reflective triangles or flares, plus a flashlight.
- Phone power: a phone charger and backup battery.
- First aid and medication: a first-aid kit and needed medicine.
- Water and food: drinking water and snacks.
- Tire or basic repair support: spare tire, working tools, or suitable repair supplies.
Useful extras include basic tools, duct tape, gloves, shop rags, and a rain poncho. Add snacks for pets if they are traveling with you. Keep items secured so they do not move around the cabin.
Cold-weather and fire contingencies
For winter travel, consider nonperishable food, spare flashlight batteries, and a reflective safety vest. Aerosol tire sealant may fail in extreme cold, and it is not meant for large punctures or sidewall damage. Read the product directions before relying on it.
| Situation | Possible option | Limitation | Safer next step |
|---|---|---|---|
| Ordinary puncture | Sealant or spare tire | Sealant may not fit every tire | Follow product and vehicle instructions |
| Extreme cold | Spare tire or tow service | Aerosol sealant may fail | Use a suitable spare or call for help |
| Large puncture or sidewall damage | Spare tire or tow service | Sealant is not intended for this damage | Do not rely on aerosol sealant |
An automotive fire extinguisher is for appropriate vehicle fires, but it is not a reason to approach a burning car. If the car catches fire, back away and wait for emergency help. Do not try to retrieve belongings from the vehicle.
Pack supplies that match the season and the people in the car. Test a flashlight before leaving and keep phone power items charged. Store the kit where you can reach it without unloading the vehicle on the shoulder.
When Should You Stop DIY Checks and Ask a Mechanic?
A warning light or unresolved recall is a reason to pause and find out what needs attention before departure. An unresolved check-engine light needs a diagnostic check before a long trip. Do not ignore the light or clear it without addressing its cause.
A repair professional can explain whether the vehicle is safe to drive and what work it may need. Ask what the diagnostic test covers before approving additional repairs. Keep notes about when the warning appeared and how the car behaved.
Warning lights and unresolved recalls
Your vehicle identification number, or VIN, has 17 characters. Use it with NHTSA’s recall lookup to check for open recalls. Contact the manufacturer or a repair professional about an unresolved recall before setting out.
Some warning lights signal issues that need prompt attention, even if the car still runs. Do not rely on switching the ignition off or clearing a code as a repair. Ask the shop to explain the finding in plain language.
Road trip inspection cost depends on the inspection scope, location, and any diagnosis or repairs needed. Ask for an estimate before authorizing work. A basic check and a diagnostic visit may cover different tasks.
Inspection needs for electric vehicles
Electric vehicles still need attention to tires, brakes, coolant, and the 12-volt battery. They also need a charge plan that fits your route and stops. Check the owner’s manual for any service tasks specific to your model.
Do not assume an EV needs no inspection because it has no gas engine. The vehicle still has parts that wear and systems that need care. Ask a technician familiar with your model about a warning or concern you cannot assess.
Ask for a written estimate that separates inspection or diagnostic work from any recommended repair.
Where Can You Get a Pre-Trip Inspection in San Antonio?
A local repair shop can help confirm which pre-trip checks it can perform and what any follow-up work would involve. A road trip car inspection near you in San Antonio can start with a call to ask about the shop’s inspection options. Ask what the check covers before you book.
Heaven Automotive is at 6645 Poss Rd. San Antonio, TX 78238. You can call (210) 682-3898 to ask about your vehicle and the service you need. Share the type of trip you have planned and any concern you have noticed.
A free road trip car check near you is not guaranteed. Ask whether the shop charges a fee and what that fee covers. Confirm whether the visit includes a visual inspection, diagnostic work, or only selected checks.
If the shop finds a concern, ask what repair it recommends and whether it can complete that work. You can also ask how long the inspection may take and what information to bring. A clear estimate helps you decide before work starts.
To find where to get your car checked before a road trip, call a repair shop and describe your vehicle and departure date. Heaven Automotive can discuss which checks may fit your needs. Call ahead to ask what the inspection covers and request approval before any additional work begins.
Conclusion
A few minutes of preparation can help you leave with a clearer picture of your vehicle’s condition. Checking early gives you time to address concerns before departure, while ignoring a warning can put your plans and safety at risk. Let a qualified mechanic assess problems you cannot resolve with a simple check.
Choose one next step today: finish your walk-around or arrange service for an unresolved issue. Hire Heaven Automotive to fix your vehicle before your next trip.