
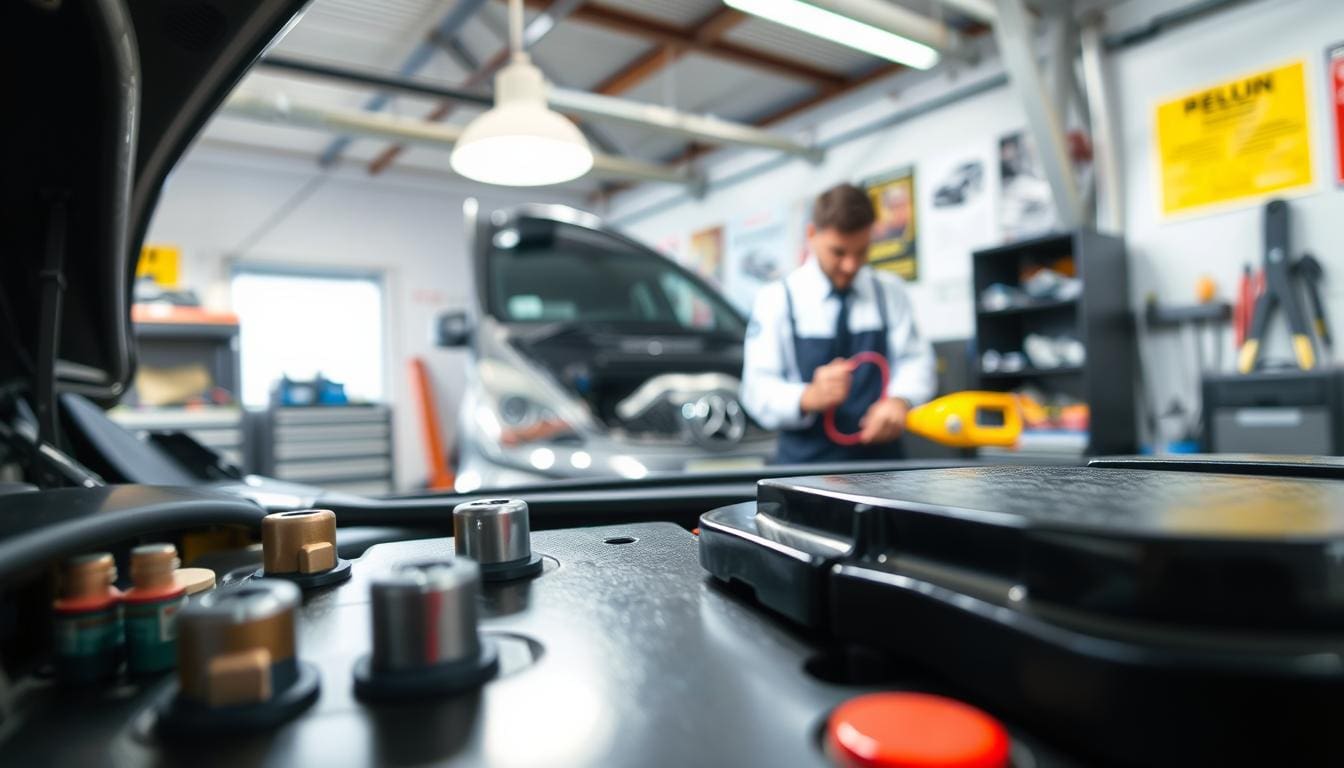
We often hear from drivers who turn the key and only get a sharp click. That noise usually points to the starter circuit, not the fuel or spark system. An electric starter spins the engine so it can fire, and over years of use it can wear or bind.
In this guide, we explain how we diagnose clicking/no-start issues and when a part swap makes sense. Many starters last a decade or more, but wear and heavy use eventually show. Most vehicle swaps take about 1–2 hours, though some cars need more time because of tight access.
We will cover how to tell starter-related clicks from battery or cable faults. Our workflow includes basic electrical checks, safe lifting, identifying wiring, removing the old unit, inspecting bolts and ring gear teeth, and installing the new part correctly.
If the job is heavy, intermittent, or hard to reach, we can handle the diagnosis and repair. Our shop offers professional testing and safe repair for U.S. drivers who prefer not to DIY.
Key Takeaways
- Clicking usually signals the starter circuit, not fuel or spark problems.
- We diagnose with simple electrical checks before swapping parts.
- Many swaps take 1–2 hours; tight packaging can add time.
- Inspect bolts and ring gear teeth during removal.
- We can perform testing and repair when the job is heavy or intermittent.
What a Clicking Noise Usually Means When You Turn the Key
Hearing a click when you try to start tells us the starting circuit tried to engage but something stopped it. We explain what that click often means and how to decide whether to keep troubleshooting or schedule service with us.
How the starter motor spins the engine
When we turn the key, the starter motor engages a small gear that meshes with the flywheel. That spin turns the engine so fuel and spark can begin combustion.
Why a worn unit can click without cranking
A worn drive or internal contacts may let the solenoid click but not allow the motor to turn. Even with a healthy battery, internal wear can stop rotation and produce a single click.
No-crank vs. slow-crank vs. grinding or whirring
We listen for patterns because each gives a different clue.
- Single click: engagement attempt, often internal contact or drive issue.
- Rapid clicking: voltage drop or poor connection at the battery or cable.
- Slow-crank: weak current or high resistance in the cables.
- Grinding/whirring: gear misalignment or worn teeth on the flywheel.
Practical next steps:
If the engine does not turn at all, we start with electrical supply checks. If it turns slowly, we check the battery and cable resistance. We never replace a car starter just on sound — we confirm with tests first.
| Sound | Likely Cause | Immediate Check | When to Call Us |
|---|---|---|---|
| Single click | Worn drive/contacts | Test solenoid and motor draw | If draw is high or motor won’t spin |
| Rapid clicking | Voltage drop/poor connection | Check battery voltage and terminals | If voltage falls under load |
| Slow crank | Weak current/high resistance | Inspect cables and battery condition | If cables show corrosion or high resistance |
| Grinding/whirring | Misalignment or gear wear | Visual flywheel and gear check | If teeth are damaged or noisy engagement |
How We Confirm It’s the Starter and Not the Battery or Cables
Before recommending any repair, we verify the battery and its wiring deliver the amps the car starter needs. At Heaven Automotive we use quick, repeatable checks so customers don’t pay twice for parts or labor.
Checking for a fully charged battery and clean terminals
We measure voltage and load-test the battery to confirm it holds charge. We inspect the negative battery post and clamps for corrosion, tightness, and heat discoloration.
Spotting corrosion, loose wire strands, and damaged insulation
We follow the battery cable run visually. We look for crushed sections, frayed wires, and corrosion that creeps under insulation. Loose wire strands near the terminal are a serious red flag because they cut effective cross-section under heavy draw.
When symptoms still point to the car starter
If voltage and cable checks pass but clicking persists, the fault most likely sits in the starter or its solenoid. At that point we perform targeted starter tests before suggesting replacement work.
| Check | What We Look For | Action |
|---|---|---|
| Battery voltage | 12.6V+ at rest, stable under load | Load test, charge or replace battery if weak |
| Negative battery terminal | Clean, tight, no corrosion | Clean clamp, tighten, retest |
| Battery cable run | Fraying, crushed insulation, corrosion | Repair or replace cable before further repair |
When a Starter Replacement Is the Right Repair
Consistent click-or-no-crank symptoms after wiring and battery checks usually point to a worn motor assembly. We use simple tests first, then decide if repair or part swap is more cost-effective for you.

Expected lifespan and why wear happens
A typical unit lasts 10+ years under normal use. Heat soak, frequent start cycles, and age wear brushes, contacts, and gears over time.
Signs that mean replace now
- Repeated clicking with a charged battery and good cables.
- Intermittent no-crank that gets worse over a short period.
- Grinding or whirring when engaging the flywheel.
Why act quickly: Delaying can damage ring gear teeth or strand you when you least expect it. Once internal wear is advanced, a full unit swap is usually more reliable than partial fixes.
Our promise: We confirm symptoms with targeted tests and perform a correct, timely starter replacement at Heaven Automotive to minimize downtime.
Tools, Parts, and Planning for Replacing a Car Starter
We prioritize planning so the job goes smoothly whether we do it or you DIY. A short checklist and the right parts prevent wasted time and avoid rework.
Must-have tools include a full socket set, ratchet, and a selection of wrenches plus extensions and swivel adapters. Add safety glasses and gloves—debris and sharp edges are common under the vehicle.
Parts planning matters: match the new unit to the exact make, model, and engine to avoid fitment issues. Verify bolt count (most units use 2–4 fasteners) and note if shims or special procedures are required.
- Location varies: many are low on the engine/transmission area and need the car lifted.
- Time estimate: most jobs take 1–2 hours; tight access or removed heat shields add time.
- Weight warning: units can be heavy (often 20+ pounds) — plan hand support before loosening the last bolt.
“Measure twice, then loosen; a small pause saves hours later.”
| Item | Why it matters | Our action |
|---|---|---|
| Socket set | Access to various bolt sizes | Bring 3/8″ and 1/2″ drive options |
| Correct part by model | Ensures fit and engagement | Confirm VIN or engine code before order |
| Support & time | Heavy part and variable location | Plan lifts and extra time for tight bolts |
Our advice: check a repair manual for vehicle-specific notes before you remove anything. If access or weight is a concern, schedule service with us and we’ll handle the tricky lifting and alignment.
Safety First: Disconnect the Negative Battery Cable
Before we touch fasteners around the battery, we perform a controlled disconnect. This simple step removes the vehicle ground and keeps tools from creating sparks or shorts while we work.
Why we remove the negative battery terminal first:
Why negative first prevents sparks and shorts
We always remove the ground clamp from the negative battery post before loosening anything else. Taking off the negative battery connection removes the vehicle ground reference. That prevents accidental arcing if a wrench contacts metal near the main power feed.
How we move and secure the cable
After loosening the terminal with the correct wrench, we inspect the clamp and post for corrosion or damage. We then position the cable so it cannot spring back to the post during the repair.
- We treat disconnecting the negative battery cable as the first non-negotiable safety action.
- We check for corrosion, loose clamps, and frayed insulation that can mimic battery problems.
- We secure the disconnected cable out of the work area to stop accidental contact.
Our practice: controlled force on the terminal nut, correct tool size, and a clear workspace reduce risk. This safety habit protects both the technician and the vehicle electrical system while we proceed with further diagnosis.
Lifting the Vehicle the Safe Way to Reach the Starter
Safely lifting a vehicle is the first real step before we can access the starter from underneath. We treat this as a controlled operation and follow simple rules so the job stays safe and predictable.
Using a floor jack and correct supports
Using a floor jack and jack stands, ramps, or wheel cribs correctly
We raise the car with a quality floor jack, then place rated jack stands under the manufacturer jacking points. For lower work, solid ramps or wheel cribs give stable access without leaving the vehicle on a jack alone.
Finding factory jacking points and choosing a stable surface
Factory points are usually behind the front wheels or in front of the rear wheels and show two V notches in the metal. We confirm positions in the owner’s manual before lifting.
Always work on concrete or another solid base. We avoid dirt, gravel, and soft asphalt because they can shift under load and make the lift unsafe.
What we never use as supports
What we never use as supports under a car
We never support a vehicle with cinder blocks, bricks, or any improvised stack. Those materials can crack or collapse and cause serious injury or damage.
If you cannot lift and support your vehicle confidently, stop and call us at Heaven Automotive. We’ll handle the lift and the rest of the job safely and efficiently.
Finding the Starter and Identifying Wiring Before Removal
Our first step is a careful visual map of the unit and surrounding parts to avoid snapped connectors. We slow down, confirm access, and plan every move so no clip, hose, or bracket gets torn during removal.
What to look for around the starter:
- Heat shields or brackets that block access and must be removed first.
- Coolant hoses or vacuum lines that sit close and need gentle rerouting.
- Harness clips and protective loom that must stay connected until the starter is free.
Confirm sockets and wrenches before you loosen fasteners: tight quarters often demand shallow or deep sockets plus extensions. We test-fit a socket and a wrench to ensure reach before breaking any bolts.
Two key electrical connections: expect a large main battery cable on a lug held by a nut and a smaller trigger wire that may be a ring terminal or a quick-connect plug. We identify styles and plan the removal order so the unit can be lowered without stressing wires or ripping connectors.
| Item | What we check | Action |
|---|---|---|
| Hoses & brackets | Interference with removal | Unbolt or reroute first |
| Socket/wrench fit | Tool reach in tight space | Confirm sizes and extensions |
| Wires & connectors | Connector type and routing | Label and protect before disconnect |
Removing the Old Starter Without Damaging Wires or Threads
We start removal with a clear plan so no wiring or threads get damaged. This controlled approach saves time and prevents added repair costs.
Disconnecting the trigger wire
First, identify the trigger connector type. For a quick-connect, press the tab and pull straight out. For a ring terminal, remove the small nut with a proper wrench and keep the hardware safe.
Removing the main power lug
Next, loosen the nut on the main battery lug. Hold a backup wrench on the lug to stop rotation. Inspect the terminal and cable end for corrosion, loose strands, or heat discoloration.
Unbolting and supporting the unit
Crack the mounting bolts loose with the correct socket, keeping the tool square to the fastener. Support the unit as the last bolts come free — many weigh 20+ pounds and can drop suddenly.
Why we never let it hang
We never let the unit dangle from wires or loose bolts. Hanging can bend terminals, tear wires, and strip threads, turning a routine step into a more costly repair.
Inspecting the Mounting Bolts and Flywheel/Flexplate Before Installation
We always validate bolt condition and flywheel teeth before setting the motor in place.
Why these bolts matter: Starter bolts are purpose-made hardware. Their knurled shank locates the unit and resists rotation under heavy engagement. Using generic grade bolts risks misalignment and poor clamping on the engine flange.
Signs of worn fasteners include flattened knurling, grooves, or rounded heads. Worn bolts let the unit shift and cause noisy engagement or premature wear of the ring gear.

Checking the ring gear and spacing
We inspect flywheel or flexplate teeth through the access opening. Smooth, even tooth faces show healthy mesh. Dog-eared or chewed teeth indicate misalignment and may need ring gear or flexplate work instead of a simple motor replacement.
- Confirm torque specs from the repair manual and hand-start bolts to avoid cross-threading.
- Watch aluminum threads carefully; consider thread inserts if damaged.
- Some vehicles require shims—follow vehicle-specific notes for correct engagement.
“Correct bolts and careful inspection make the difference between a one-time repair and repeat service.”
Conclusion
When a car clicks and won’t turn over, a quick, methodical check saves time and money.
Core takeaway: the symptom often points to the starter circuit, but we always confirm battery and cable condition before we replace parts.
Our safe flow is simple: diagnose, disconnect the negative terminal, lift the vehicle securely, identify wiring, remove connections, take out the old unit, inspect bolts and ring gear, then install and verify.
What matters most: clean electrical connections, correct hardware, and proper alignment so the car starter engages smoothly and avoids grinding.
If you’re unsure about lifting the vehicle, diagnosing voltage drop, or handling heavy parts with a wrench, stop and call us. Preventive maintenance on battery and cables reduces future no-start time.
If your car clicks but won’t start, hire Heaven Automotive to diagnose and complete the repair for your vehicle quickly and correctly.